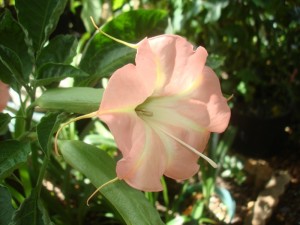
 One of the most important requirements for Brugmansia propagation and growth is a proper soil mix. Whether you’re propagating cuttings, placing your plants in containers or putting them in-ground, the soil environment you provide for them will determine the quality and longevity of your plants.
Potting Up Cuttings
A good cutting should be at least as thick as your thumb and no less than 6 – 8″ tall. A good cutting has small “nubbies” or raised bumps evident. The bumps indicate a burgeoning root, so whay not take advantage of the opportunity! Use clean, sharp pruners when you make your cuttings. You may choose to use a powdered, rooting medium or not. It depends on the presence of those “nubbies”. More nubbies, less or no rooting medium. Few or no “nubbies”, use the rooting medium as it’s label suggests.
You’ll want to create a very light soil mix, because cuttings will rot if left in soggy soil that will not drain. A good cutting mix is about 2/3 Perlite to 1/3 all purpose or fortified potting soil. After you have your soil mixed, take a little rooting hormone (1 teaspoon) and mix it with water in a gallon container, set it aside. Make sure your cutting is facing in the right direction. Yes, it is possible to put them in upside down until you get used to doing this. An “UP” arrow, drawn on the cutting with a Sharpie when first taken, saves guesswork. Grab a 4″ pot and fill it with your mix. Wet the cutting end you wish to root with a little water, then stick it in the rooting medium. Tap off the excess powder, make a hole in your soil mix, push the cutting in and press the soil around it until it is straight and firmly packed. Now, its time to use your “secret sauce”, that stuff in the gallon jug. Pour the brew into the pot until the soil is thouroughly wet. Let it drain, then place your newly potted cutting in a warm, low-light location. If all goes well, you should see new growth and roots forming from between 3 days to a week. Don’t drown the new babies! Water when the surface soil is dry.
Transplanting Rooted Cuttings
After about 2 – 3 weeks, you should see roots poking through the bottom of your 4″ pot. Give the cutting a wiggle to see if new roots have filled the pot. If they have, it’s time to repot into a larger container with a different soil mix. This time, you’re going to make a 50% Perlite to 50% potting soil mix. Your established cutting has more roots and need a mix that will hold more water for a longer period of time. The soil should still drain, but a little more slowly than the original rooting mix. Container size is important too. A 4″ pot sized cutting will rot if placed in a gallon or 3 gallon pot. It simply can’t handle all that room and moisture. The best next size for your four incher is a 6″ pot. So, place your rootbound cutting into a 6″ pot with the new mix. Water with a mix of Miracle Grow (1/4 teaspoon to a gallon of water), place in a low light area for about a week, then give it full sun.
Container Planting
Your Bruggie has been living happily in it’s 6″ pot, is about two feet tall and rootbound. Time to make a decision. If you live where freezes occur, it would be better to place your Brugs in containers. They’re easy to move and can be either brought inside your home or placed in an outdoor greenhouse where temperatures can be regulated.
If your choice is container growth, grab a 3 gallon pot and repot your plant into your 50% Perlite to 50% potting soil mix. Water with Miracle Grow and place your newly potted plant where it can get morning sun and afternoon shade. If your a good Brugmansia parent, your plant will grow like a weed. When it’s roots fill the 3 gallon pot, it’s time to go to a 7 gallon pot, same soil mix, same watering method. A seven gallon pot will sustain a mature plant quite well until its time to haul it inside for overwintering.
Planting In-ground
If a 3 gallon-sized plant is rootbound, and your zone experiences no wintertime freezes, go ahead and plant it in-ground.
Dig a hole about 6″ in circumferance wider than plant with it’s rootball considered. Gently roll the container and plant on it’s side to loosen it from the pot. Place it in the hole to the depth it was inside the pot. Not too deep, not too shallow. Use some of your 50-50 soil mix to fill in the space between the rootball and wall of the hole. Pack it in firmly. Take some adjacent soil and build a little moat around the area where you planted your Brug. Fill the moat with water a few times, and let it sink down into the hole. Do the same over the next 2 weeks when you water (every three days should be fine), then break down the moat to ground level.
Remember to give your Brugmansia a side dressing of granular fertilizer. Regular 10-10-10 is fine. You may also wish to add nutrients or liquid fertilizer according to your plant’s requirements. Happy growing!

